How to Convert a Logo into a Vector: A Comprehensive Guide
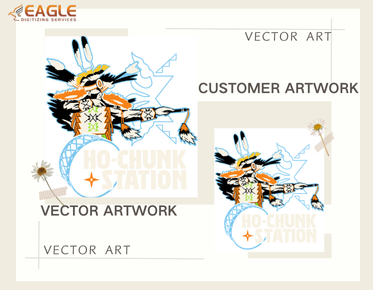
In today's digital age, having a logo in a vector format is crucial for maintaining its quality across various platforms and sizes. Whether you're a graphic designer or a business owner, understanding how to convert a logo into a vector can significantly enhance your brand's visual appeal. In this guide, we'll explore the step-by-step process of vectorizing a logo, the tools you can use, and the benefits of having a vector logo. Let's dive in and transform your logo into a scalable masterpiece. For professional assistance, you can explore vector conversion services that offer expertise in this area.
Understanding Vector Graphics
Before we delve into the conversion process, it's essential to understand what vector graphics are. Unlike raster images, which are made up of pixels, vector graphics are composed of paths defined by mathematical equations. This means they can be scaled infinitely without losing quality, making them ideal for logos, illustrations, and any design that requires flexibility in size.
Why Convert Your Logo to a Vector?
There are several reasons why converting your logo to a vector format is beneficial:
- Scalability: Vector logos can be resized to any dimension without losing clarity, ensuring your brand looks professional on everything from business cards to billboards.
- Editability: Vector files are easier to edit, allowing designers to make quick adjustments to colors, shapes, and other elements.
- Compatibility: Vector formats like SVG, AI, and EPS are widely supported across different design software and platforms.
Tools for Vectorizing a Logo
Several tools can help you convert a logo into a vector format. Here are some popular options:
Adobe Illustrator
Adobe Illustrator is a powerful tool for creating and editing vector graphics. It offers a range of features that make vectorizing a logo straightforward. Here's how you can use it:
- Open your logo in Adobe Illustrator.
- Select the logo and go to the "Image Trace" panel.
- Choose a preset that best matches your logo's style, such as "High Fidelity Photo" for detailed logos or "Black and White Logo" for simpler designs.
- Adjust the settings to refine the vectorization process, such as increasing the threshold for more detail.
- Once satisfied, click "Expand" to convert the traced image into vector paths.
Inkscape
Inkscape is a free, open-source vector graphics editor that offers robust vectorization capabilities. To vectorize a logo in Inkscape:
- Import your logo into Inkscape.
- Select the logo and navigate to "Path" > "Trace Bitmap."
- Choose a tracing method, such as "Brightness Cutoff" or "Edge Detection," and adjust the settings as needed.
- Click "OK" to create a vector version of your logo.
Steps to Convert a Logo into a Vector
Now that you're familiar with the tools, let's go through the general steps to convert a logo into a vector:
Step 1: Prepare Your Logo
Start by ensuring your logo is in a high-resolution format. The better the quality of the original image, the more accurate the vectorization will be. Clean up any unnecessary elements and make sure the logo is in a format that your vector software can open, such as PNG or JPEG.
Step 2: Choose the Right Tool
Select a vectorization tool that suits your needs and expertise level. For beginners, tools like Inkscape offer a user-friendly interface, while professionals might prefer the advanced features of Adobe Illustrator.
Step 3: Trace the Logo
Use the tracing feature in your chosen software to convert the logo into vector paths. Adjust the settings to capture the details accurately, and don't hesitate to experiment with different presets or methods to achieve the best results.
Step 4: Refine the Vector Paths
Once the logo is vectorized, refine the paths to ensure smooth lines and accurate shapes. This may involve adjusting anchor points, smoothing curves, and cleaning up any artifacts from the tracing process.
Step 5: Save in a Vector Format
Finally, save your vectorized logo in a suitable format, such as SVG, AI, or EPS. These formats ensure compatibility with various design software and maintain the scalability of your logo.
Common Challenges and Solutions
Vectorizing a logo can sometimes present challenges, especially with complex designs. Here are some common issues and how to address them:
Complex Details
Logos with intricate details may require manual adjustments after tracing. Use the pen tool to refine areas that the automatic tracing might have missed.
Color Matching
Ensure that the colors in your vector logo match the original. Adjust the color settings in your vector software to achieve accurate color representation.
Benefits of Professional Vector Conversion Services
While DIY vectorization is possible, professional services offer precision and expertise that can save time and ensure high-quality results. Companies like Eagle Digitizing provide vector art services that cater to various design needs, from simple logos to complex illustrations.
Future Trends in Logo Vectorization
As technology advances, the process of vectorizing logos is becoming more automated and accessible. AI-driven tools are emerging, offering faster and more accurate vectorization. These innovations are set to revolutionize the design industry, making it easier for businesses to maintain a consistent brand image across all platforms.
In conclusion, converting a logo into a vector is a valuable skill that enhances your brand's visual identity. Whether you choose to do it yourself or seek professional help, understanding the process and tools available will ensure your logo remains sharp and impactful. Eagle Digitizing excels in delivering professional vector art services, transforming creative visions into scalable designs.


