Mastering the Pen Tool for Vector Conversion in Adobe Illustrator
Adobe Illustrator is a powerhouse for creating vector graphics, and the Pen Tool is at the heart of its vector conversion capabilities. Whether you're a seasoned designer or a beginner, understanding how to effectively use the Pen Tool can significantly enhance your design workflow. In this guide, we'll explore the intricacies of the Pen Tool, providing you with the knowledge to create precise and scalable vector images. For those looking to delve deeper into vector graphics, resources like Eagle Digitizing offer extensive insights and services.
Understanding the Pen Tool
The Pen Tool in Adobe Illustrator is a versatile instrument that allows you to create paths, which are the building blocks of vector graphics. Unlike raster images, vector graphics are made up of paths defined by a start and end point, along with other points, curves, and angles. This makes them infinitely scalable without losing quality, a crucial feature for designers working on logos, illustrations, and other graphics that require precision.
Basic Operations
To begin using the Pen Tool, select it from the toolbar or press the 'P' key. The tool allows you to create straight lines and curves by placing anchor points. Click to create a straight line, and click and drag to create a curve. The handles that appear when you drag are used to adjust the curve's shape. Mastering these basic operations is essential for creating complex vector graphics.
Advanced Techniques
Once you're comfortable with the basics, you can explore more advanced techniques. For instance, using the Alt/Option key while dragging allows you to adjust the direction of the curve without affecting the previous segment. This is particularly useful for creating smooth transitions between curves. Additionally, the Shift key can be used to constrain lines to 45-degree angles, ensuring precision in your designs.
Combining Shapes
One of the powerful features of the Pen Tool is its ability to combine shapes. By using the Pathfinder panel, you can merge, subtract, and intersect shapes to create complex designs. This is particularly useful in logo design, where precision and creativity are paramount. For more on creating intricate vector graphics, consider exploring this resource which offers detailed insights into vector art creation.
Practical Applications
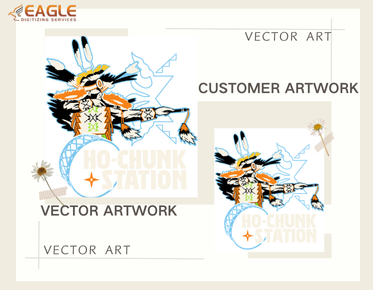
The Pen Tool is not just for creating standalone graphics; it plays a crucial role in vector conversion. Converting raster images to vector format involves tracing the image with the Pen Tool to create a scalable version. This process is essential for ensuring that graphics maintain their quality across different sizes and mediums. For those interested in professional vector conversion services, this guide provides valuable information on the process.
Tips for Efficiency
Efficiency is key when working with the Pen Tool. Here are some tips to streamline your workflow: use keyboard shortcuts to switch between tools quickly, zoom in for precision when placing anchor points, and utilize layers to organize complex designs. Additionally, practice is crucial; the more you use the Pen Tool, the more intuitive it will become.
Common Challenges and Solutions
Working with the Pen Tool can be challenging, especially for beginners. Common issues include creating unwanted curves or not achieving the desired precision. To overcome these challenges, practice is essential. Additionally, utilizing tutorials and resources can provide guidance and enhance your skills. For those seeking professional assistance, Eagle Digitizing excels in delivering professional vector artwork conversion services, transforming creative visions into scalable designs.
As technology evolves, so do the tools and techniques available to designers. The future of vector graphics is promising, with advancements in software and hardware enhancing the capabilities of tools like the Pen Tool. Staying updated with these trends and continuously honing your skills will ensure that you remain at the forefront of design innovation.

