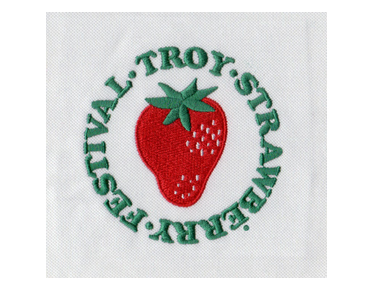

Illustrative Before & After: Cleaning Up a Logo Stitch Sequence
A cleaner logo stitch sequence gives embroidery a more logical path across the design, helping reduce unnecessary jumps, trims, and awkward transitions. In this illustrative before-and-after, logo stitch sequence cleanup means reviewing how objects connect and sew—not simply changing the order at random. Thoughtful embroidery digitizing service can turn that planning into a production-ready design suited to the logo’s details and intended application.
What “before and after” means in stitch sequencing
A stitch sequence is the order in which a machine sews the objects that make up an embroidered design. That order affects how the needle travels, where thread changes or trims may occur, and how one stitched area interacts with the next. A design can contain appropriate shapes and colors yet still be inefficient or unstable if its sewing sequence is poorly planned.
Here, “before and after” describes a general cleanup process, not a documented customer project or a guaranteed visual result. Without a specific logo file and sew-out to examine, there is no single sequence to show or claim as a real transformation. The useful comparison is between a sequence that follows object order without enough production consideration and one that has been reviewed for stitch flow, overlaps, and the intended fabric.
The goal is not to minimize every movement at any cost. A shorter path can be counterproductive if it creates visible travel stitches, disturbs finished areas, or compromises registration. Good cleanup balances efficient machine movement with a clean appearance and sound embroidery construction.
Before: common signs that a sequence needs review
An untidy sequence may reveal itself in a stitch file or during sewing. Watch for patterns such as:
- Frequent jumps or trims: The machine repeatedly travels between separated objects when a more practical sewing order may be possible.
- Travel across exposed areas: Connecting stitches pass through open parts of the design where they could be visible on the finished piece.
- Later stitches disturbing earlier ones: The order may cause a subsequent object to push, cover, or pull against an area that has already been sewn.
- Unplanned overlaps: Objects meet in a way that creates excess buildup, gaps, or uneven transitions.
- Small details sewn too early: Fine elements may be exposed to distortion or partially covered as nearby sections are stitched.
- Unclear color or object progression: The file moves between areas without a deliberate path that considers both the design and production.
These are prompts for investigation, not proof that every jump, trim, overlap, or color change is a mistake. Some separations are necessary, and some travel is preferable to sewing through a visible area. The correct decision depends on the design, fabric, backing, machine setup, and how the object shapes are built.
After: a more intentional path through the design
During cleanup, a digitizer reviews the design as a sequence of sewn objects rather than as a flat picture. The aim is to make the production path deliberate while preserving the artwork’s recognizable details. Depending on the file, a revised sequence may group compatible objects, adjust the order of adjacent elements, or change where travel stitches run.
A practical review typically asks:
- What should sew first? Foundation and background elements may need to precede details that sit on top of them, while the exact order depends on construction.
- Which objects can follow one another cleanly? Adjacent areas may be sequenced to limit avoidable movement, provided that the connection does not create visible or bulky stitching.
- Where will travel stitches land? Travel paths should be considered in relation to open spaces, outlines, and areas that will later be covered.
- Will the order support registration? The sequence should account for how fabric can shift or pull as stitching builds, rather than treating every object as independent.
- Does the final order suit the application? A design intended for a cap, left-chest placement, or another garment area may need different production considerations.
Sequence edits work alongside other digitizing decisions. Stitch direction, underlay, pull compensation, and stitch density all influence how objects behave on fabric. Rearranging objects cannot, by itself, correct a design that is too dense, poorly underlaid, or unsuitable for the material. A useful embroidery stitch density guide can help explain why density matters, but the correct settings still depend on the design and production conditions.
Why object properties matter to sequence cleanup
Every object contributes to the way a design sews. Its stitch type, direction, density, underlay, and relationship to neighboring shapes can affect both the sequence and the finished surface. Reviewing embroidery object properties can help clarify what an object is set up to do, but changing a property should serve a specific production purpose—not simply make the file appear more orderly.
For example, two objects that touch on screen may not need to sew in immediate succession if their order would expose travel stitches or compromise the edge. Conversely, sewing a suitable neighboring area next may reduce unnecessary movement without harming the result. The digitizer has to judge the actual stitch paths, overlap, and fabric behavior rather than rely on a universal ordering rule.
This is especially important for small lettering and fine logo details. Their readability depends on more than sequence: letter size, stitch structure, density, and the fabric all matter. A sequence that places fine details at an appropriate point in production can support a cleaner result, but it cannot restore detail that is too small or incorrectly digitized for the intended application.
How to assess a cleaned-up sequence
When comparing an original file with a revised one, look beyond the number of stitches or the apparent neatness of the object list. Evaluate whether the sequence makes sense for the design and whether it produces the intended result on the actual material. A sew-out is valuable because it can reveal behavior that is not obvious from a screen preview.
- Check whether the design sews in a deliberate, understandable order.
- Look for avoidable jumps and trims, while confirming that necessary separations remain.
- Inspect open areas for unwanted travel stitches and visible connecting paths.
- Review overlaps and transitions for gaps, excessive buildup, or disturbed edges.
- Assess small details and lettering on the intended fabric rather than judging them only on screen.
- Confirm that sequence changes have not created new problems elsewhere in the design.
A lower stitch count or fewer trims is not automatically a better result. Production efficiency matters, but so do coverage, registration, durability, and appearance. The best revision is the one that improves the sequence without sacrificing the logo’s legibility or the quality of the sewn design.
When to request professional digitizing help
If a logo file contains awkward transitions, repeated trims, exposed travel stitches, or inconsistent results across production runs, the issue may require more than a simple sequence adjustment. An experienced digitizer can review how the file is constructed and determine whether the sequence, object settings, or broader digitizing approach needs attention.
Eagle Digitizing provides an embroidery digitizing service for customers who need artwork prepared for embroidery production. Sharing the intended application and relevant production details helps the digitizing work address the actual use case instead of treating the image as a screen-only graphic. To begin, submit artwork for digitizing through Eagle Digitizing’s support page.
A cleaner sequence starts with production-aware digitizing
In an illustrative before-and-after, the meaningful improvement is not merely a different order on screen. It is a sequence planned around stitch flow, visible travel, object relationships, and the material that will be embroidered. Because every logo and production setup is different, the right cleanup depends on reviewing the actual design rather than applying a one-size-fits-all rule.
For a logo that needs more purposeful stitch flow, embroidery digitizing service can help address sequence and construction as part of preparing the design for embroidery. Share the file and its intended application with Eagle Digitizing to discuss logo stitch sequence cleanup and take the next step toward a production-ready embroidery design.