How do you build a screen for screen printing?
Screen printing is a versatile and widely-used technique in the printing and branding industry. It offers vibrant, durable prints on various materials, ranging from textiles to glass. But to achieve such quality prints, it's essential to start with a well-crafted screen. Building a screen for screen printing involves several steps, each crucial for ensuring the desired print outcome. Let's delve into the detailed process of creating a screen that stands up to the demands of professional screen printing.
Materials and Tools Required
Before you start building your screen, gather the necessary materials and tools. You'll need a wooden or aluminum frame, mesh fabric, a staple gun or adhesive, emulsion for coating, a squeegee, and a screen printing press. Each of these components plays a pivotal role in the functionality and durability of the screen.
Selecting the Right Frame
The choice of frame material is crucial. Wooden frames are more cost-effective but may warp over time, especially if not properly maintained. Aluminum frames, on the other hand, offer stability and longevity, making them a preferred choice for professionals aiming for consistent results. The frame size should align with the print area of your designs and the capacity of your printing press.
Choosing the Correct Mesh Fabric
Mesh fabric is another vital element in the screen printing process. The thread count of the mesh affects the level of detail you can achieve with your prints. A lower mesh count (such as 110 - 160) is suitable for designs with thicker ink requirements, while higher counts (up to 230 and beyond) are ideal for intricate designs that require fine lines. It's a balanced choice for those looking to convert art to vector and use it for detailed and high-quality prints.
Stretching and Attaching the Mesh
Once you've selected the appropriate mesh, the next step is stretching it over the frame. Tight stretching ensures good tension, which is critical for clean and consistent prints. Mesh can be attached using a staple gun for wooden frames or adhesive for aluminum frames. Proper application of tension avoids common printing issues like blurred lines and ink bleeding.
Coating with Photo Emulsion
The coated mesh essentially prepares your screen for the stencil. Start by placing the screen flat, pour the emulsion onto the mesh, and spread it evenly using a squeegee, ensuring a thin and uniform coating. This layer will react to light and create the stencil template. After you're done, let the screen dry in a dark, cool environment to avoid premature exposure.
Exposing the Screen
With the screen coated and dried, it's time to transfer your design onto it. Position a transparency of your artwork onto the screen. Using a light source, expose the screen to transfer the design onto the emulsion. Areas blocked by the design will remain unexposed and soluble, forming the stencil once washed away. For complex designs, consider working with vector art services online to ensure your artwork is perfectly prepared for screen transfer and precise print results.
Washing Out the Stencil
The final step in preparing your screen involves washing away the unexposed emulsion. Rinse with a gentle spray of water until the design is visible. This step can be tricky as over-washing may dilute details, while under-washing could leave the stencil incomplete. Once you're satisfied, let the screen dry completely.
Maintaining Your Screen
Proper maintenance of your screen ensures longevity and quality prints. Regularly wash your screen after use to prevent ink and emulsion build-up. Check the tension and make necessary adjustments if you notice any slack. Consider re-coating your screens periodically, particularly if they begin showing signs of wear.
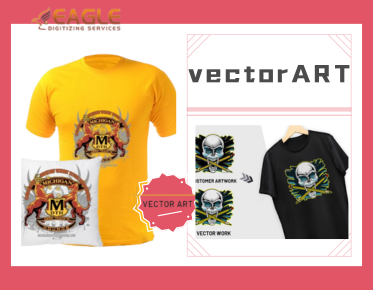
Eagle Digitizing can assist in preparing vector designs suitable for screen printing, ensuring that the artwork translates perfectly onto the printing screen. This service is invaluable for those looking to maintain a high standard of print quality without performing every task independently.
Considerations for Professional Use
For individuals and businesses considering scaling their printing operations, attention to detail in screen preparation cannot be overstated. Investing in high-quality frames and mesh, alongside professional coating and exposure supplies, can significantly enhance production efficiency. Additionally, integrating services like those available from Eagle Digitizing can streamline workflow by delivering optimized vector conversion services which seamlessly convert intricate designs into formats ideal for screen printing preparation.
Future Trends in Screen Printing
Looking ahead, the future of screen printing will undoubtedly continue to evolve with technology. Innovations in screen preparation, such as automated stretching machines and eco-friendly emulsions, are already making their way into mainstream use. Furthermore, advancements in digital design technology are further closing the gap between digital and traditional screen printing methods. Such advancements mean that the field is ripe with opportunities for those who embrace both technology and craftsmanship to deliver exquisite, detailed prints consistently.
As you ponder the essential steps in preparing a screen for printing, consider how these likely advances might enhance your practice. For instance, understanding how digitization services can play a role in streamlining art preparation might be a critical strategy in maintaining pace with industry advancements.


