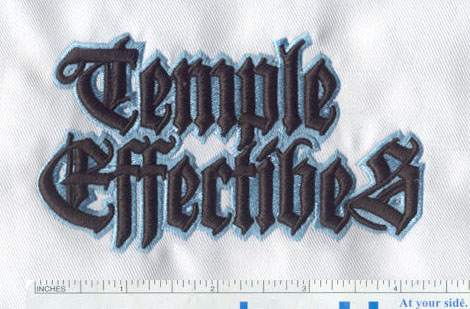
Creating 3D Embroidery with Advanced Digitizing Techniques: A Three-Dimensional Revolution in Stitching
Embroidery is an art that has been practiced for centuries, adding texture and dimension to fabrics and textiles. Traditional embroidery involves creating two-dimensional designs with various stitch patterns. However, in recent years, there has been a fascinating evolution in the world of embroidery: the emergence of 3D embroidery. This innovative technique takes stitching to the next level, adding depth and dimension to designs. We'll delve into the process of creating 3D embroidery with advanced digitizing techniques and explore how this three-dimensional revolution is transforming the world of stitching.
The Basics of 3D Embroidery
Before we dive into the digitizing techniques, let's understand what 3D embroidery is and why it's gaining popularity.
- Depth and Texture: 3D
embroidery involves adding a third dimension to traditional embroidery
designs. This is achieved by raising specific elements of the design to
create depth and texture.
- Layering and Padding: To
create 3D effects, padding and layering techniques are employed. These
techniques involve using additional stitches or materials to lift certain
parts of the design.
- Enhanced Visual Appeal: 3D
embroidery brings an extra layer of visual appeal to designs, making them
stand out and creating a tactile experience.
- Endless Creativity: This technique opens up a world of creativity for embroiderers, allowing them to experiment with different textures and effects.
The Digitizing Process for 3D Embroidery
Creating 3D embroidery requires advanced digitizing techniques. Here's a step-by-step guide to help you achieve stunning three-dimensional effects in your embroidery designs:
- Design Selection: Start
with the selection of a suitable design. Keep in mind that not all designs
are suitable for 3D embroidery. Choose one that can benefit from added
texture and depth.
- Digitization Software:
Invest in high-quality embroidery digitization
software. This is essential for creating the digitized file that your
embroidery machine will use.
- Design Analysis: Analyze
the selected design to identify areas that could benefit from 3D effects.
These might include flower petals, leaves, letters, or any part of the
design that can be elevated.
- Stitch Types: Choose the
appropriate stitch types for your 3D elements. Common stitches used for
padding and layering include satin stitches, fill stitches, and motif
stitches.
- Layering Technique:
Implement layering to build up the desired height and texture. This can be
achieved by adding multiple layers of stitches to certain areas of the
design.
- Padding Materials: In some
cases, you may use padding materials to create 3D effects. This can
include foam, batting, or other textured materials that are placed beneath
the fabric.
- Density Adjustments: Adjust
the stitch density to create the desired thickness and texture. Try out
various settings to achieve the best results.
- Test Runs: Before
embroidering your final project, run test samples to ensure that the 3D
effects are coming out as expected. Make adjustments as needed.
- Thread Selection: Choose
the right thread colors and types to complement the 3D elements.
Variegated threads and metallic threads can add extra visual interest.
- Embroidery Machine Setup:
Set up your embroidery machine with the digitized file and the appropriate
thread and fabric. Ensure that the machine is in excellent operational
condition.
- Embroidery Process: Let
your embroidery machine work its magic. As it stitches the design, the 3D
effects should become apparent. Monitor the process to ensure it's going
as planned.
- Finishing Touches: After
the embroidery is complete, you may need to make some manual adjustments
to enhance the 3D effects. Trim threads, reshape elements, and make any
necessary alterations.
- Experimentation: Don't be afraid to experiment with different designs, materials, and techniques. 3D embroidery offers endless creative possibilities.
Applications of 3D Embroidery
3D embroidery is a versatile technique that can be used in various applications, including:
- Fashion: Elevate clothing
with textured floral designs, 3D logos, or intricate patterns.
- Accessories: Create 3D
embroidered patches, badges, and jewelry.
- Home Decor: Add depth and
texture to cushions, table linens, and wall hangings.
- Personalization: Customize
3D embroidered gifts such as monogrammed towels, personalized bags, or
embroidered portraits.
- Art and Craft: Incorporate 3D embroidery into art projects and craft creations for added visual and tactile appeal.
Conclusion
3D
embroidery with advanced digitizing techniques is a fascinating evolution in
the world of stitching. It adds depth, texture, and a new level of creativity
to embroidery designs. By following the digitizing process outlined in this
blog post and experimenting with various materials and techniques, you can
achieve stunning 3D effects that elevate your embroidery projects to a whole
new dimension. Whether you're a seasoned embroiderer or just starting, 3D
embroidery offers endless opportunities for artistic expression and innovation
in the world of textiles and fashion.


