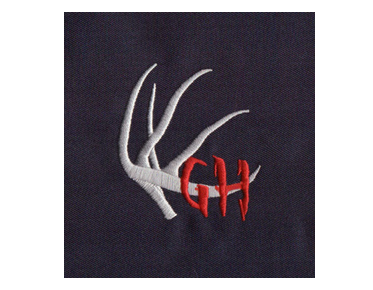

Stitch Direction and Density: Two Controls That Shape Embroidery Texture
Embroidery texture depends heavily on two digitizing decisions: the angle stitches follow and how closely they are placed. Stitch direction embroidery choices influence sheen, dimension, and how a design sits on fabric, while stitch density embroidery settings affect coverage, flexibility, and sew-out stability. Neither control works in isolation; both must suit the design, material, and production conditions.
Why these two controls change the look of a design
Embroidery is built from thread paths, not printed color. As light catches the thread, stitch angles create visible highlights and shadows. The spacing between stitches determines how much fabric shows through and how solid or raised an area feels. A small adjustment to either can change the appearance of a fill, the definition of a letter, or the way a logo behaves after it is sewn.
That is why a design can look polished on screen but feel flat, crowded, or uneven when stitched. The artwork shows shapes and colors; the digitized file defines how the machine will build those shapes with thread. Direction and density are part of that construction plan.
Stitch direction: shaping sheen, flow, and detail
Stitch direction is the angle or path followed by stitches in a particular area. It affects more than visual alignment. Direction can help a fill follow the form of a shape, separate neighboring sections, and create a subtle sense of movement. In lettering, it can contribute to clean edges and consistent visual weight. In a logo with several fills, changing angles between sections can make boundaries easier to read without adding extra colors.
When stitch angles are poorly chosen, broad areas may appear flat or show unwanted bands of light. Adjacent shapes can blend together if their stitches run in the same direction, while abrupt changes can make a design look fragmented. Small shapes and narrow strokes have less room for directional variation, so the digitizer must balance visual intent with what can be sewn reliably.
Thoughtful digitizing stitch direction starts with the shape and the material. A curved element may need stitch paths that follow its contour, while a compact block of lettering may call for directions that preserve legibility. The goal is not to vary every angle for effect. It is to use direction where it supports the design and produces a clean, consistent sew-out.
Density: coverage without unnecessary buildup
Stitch density describes how closely stitches are placed within an embroidered area. More stitches do not automatically mean better coverage. If a fill is too open, the base fabric may show through more than intended. If it is too tight, the area can become stiff or bulky, the fabric may pucker, and thread or needle stress can increase. Excessive stitching can also make details harder to distinguish rather than more precise.
The right density depends on several connected factors: the size and shape of the area, the fabric’s weight and stability, the thread, the underlay, and the way the garment will be hooped and sewn. A setting that works well on a stable woven material may not produce the same result on a stretchy knit. Even within one logo, different elements may need different treatment.
Density also affects how neighboring sections interact. Closely packed fills can push against one another, changing the finished dimensions or creating raised ridges. Where an outline meets a fill, the digitizing plan needs to account for how those stitches will overlap. A good result comes from controlled coverage—not from filling every space with the maximum number of stitches.
How direction and density work together
Direction and density are separate settings, but their effects meet on the finished garment. A change in stitch angle can alter how a fill reflects light and how it settles on the fabric. Density affects how firmly that fill covers and holds its shape. Together, they influence whether a region looks smooth, dimensional, flexible, or overbuilt.
For example, a wide filled shape may need a direction that supports its visual form while allowing the material to remain manageable. A small area may need careful stitch planning to achieve adequate coverage without creating a hard lump. The answer is not always to add stitches: a better direction, suitable underlay, or a carefully planned overlap may help address the underlying issue.
These decisions are especially important when a design includes compact lettering, narrow outlines, small gaps, or several adjoining color areas. At small sizes, there is less room to hide a poor angle or excessive density. The digitizer must consider which details can be retained at the intended embroidery size and which need adjustment for clean production.
Common sew-out symptoms and what they can suggest
- Fabric showing through a fill: The area may need a review of its coverage, stitch direction, or construction—not simply an across-the-board density increase.
- A stiff or raised patch: Dense stitching, overlapping areas, or unsuitable construction may be contributing to excessive buildup.
- Uneven shine or visible bands: Stitch angles may be working against the shape or creating inconsistent reflections across a broad area.
- Puckering around an embroidered section: Fabric stability, hooping, underlay, density, and pull compensation may all need consideration.
- Small lettering that closes up: The lettering may be too small for its stitch structure, or the density and spacing may need to be reassessed.
These symptoms are clues, not one-setting diagnoses. Fabric, stabilizer, hooping, thread, and machine conditions can influence the outcome. A sew-out provides valuable evidence about how the digitized design behaves in production, especially when a logo is being prepared for a specific garment or material.
Why artwork alone cannot set the answer
A logo file does not tell the machine how to manage every production challenge. The same artwork can require different digitizing decisions when it moves from a stable cap front to a soft shirt or a lightweight jacket. The target size matters, too: a large graphic can preserve features that may disappear when reduced to a small chest logo.
Effective digitizing translates the visual design into a stitch plan that accounts for those conditions. That may mean adjusting stitch angles, balancing density across sections, using appropriate underlay, or compensating for how fabric and thread behave under tension. The choices are connected: changing one setting can affect coverage, registration, texture, and stitch count elsewhere.
When evaluating embroidery texture settings, keep the finished material and intended result in view rather than treating any single value as universal. Useful settings depend on the design and its production context. A visually appealing preview is only one part of the decision; the sewn result is what ultimately matters.
What to share when ordering digitizing
Clear project details help a digitizer make decisions that suit the intended sew-out. When requesting a file, include the artwork and, if available, information about the garment or fabric, the finished design size, and where the embroidery will be placed. Mentioning whether the design is for a cap, left chest, jacket, or another application can help clarify the constraints that affect direction and density.
If you have a sew-out photo or can describe a specific issue—such as fabric showing through, a stiff fill, or lettering that is difficult to read—include that information as well. It helps focus the review on the outcome you need. Production requirements may differ, so the best stitch plan is one made for the actual application rather than copied from a generic setting.
Eagle Digitizing provides embroidery digitizing for customers preparing designs for production. Share your artwork and project details to request a quote or discuss the file requirements. A thoughtful review of stitch flow, coverage, and material needs can help turn a logo into embroidery that looks intentional and performs well on the finished product.
Make texture a digitizing decision
Stitch direction gives embroidered areas their visual flow, while density helps control coverage and buildup. When they are planned together—and considered alongside fabric, design size, and construction—the result is more likely to retain its intended character after sewing. For help with stitch direction embroidery and professional embroidery digitizing, contact Eagle Digitizing with your artwork and application details. Request a quote and take the next step toward a production-ready embroidery file.