
Towel and Terry Cloth Embroidery Digitizing Tips
Successful towel embroidery starts with a design planned for the fabric, not simply copied from a flat logo file. Professional towel embroidery digitizing accounts for terry loops, stitch coverage, and how the design will be held in place during sewing. With the right setup, terry cloth embroidery can remain clear and balanced without burying fine details under the pile.
Why towels need a fabric-specific embroidery file
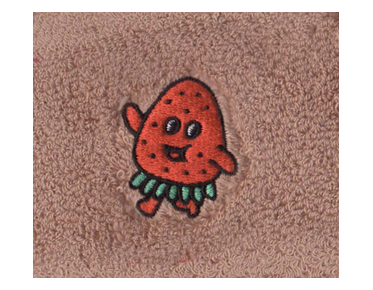
Terry cloth has a raised, looped surface that behaves differently from a smooth woven shirt or jacket. Stitches can sink between the loops, while the pile can rise through open areas of a design. This may soften outlines, obscure small text, or make a logo look less defined than it appeared on screen.
These challenges matter across many towel applications: company and hotel branding, spa merchandise, team towels, promotional items, and personalized gifts. In each case, the embroidered mark needs to read clearly on a textured surface and hold its shape through production. A design that works well on a flat garment may need adjustments before it is ready for a towel.
That is where professional digitizing makes a practical difference. An embroidery file translates artwork into a stitch plan. For terry, that plan should account for the fabric’s pile and the intended design size, placement, and level of detail. Choosing digitizing for towels helps address those requirements before the design reaches the embroidery machine.
Design decisions that improve readability
Not every element in a logo needs to be reproduced at its original scale. Fine lines, tight gaps, tiny lettering, and delicate outlines can become difficult to see when stitched over loops. During digitizing, the design may need selective simplification so its most recognizable features remain clear at the actual embroidery size.
- Review small lettering: Check whether letter shapes and spaces will remain open once stitched. Increasing size or simplifying the wording may be preferable to forcing very small text into the design.
- Protect open areas: Broad fills can create a heavy result and may conceal details around them. Stitch coverage should suit the artwork and fabric rather than rely on extra density to compensate for the pile.
- Plan outlines deliberately: An outline can help define a shape, but its placement and stitch sequence matter. If it does not align well with the underlying fill, the finished edge may look uneven.
- Match the design to the towel: A compact monogram and a large, detailed logo have different production demands. The digitizing should reflect the size and intended placement of the specific design.
The goal is not to add stitches everywhere. Excessive coverage can make the embroidered area stiff or bulky, while too little support can let the pile interfere with the design. Appropriate stitch density and underlay help balance coverage, fabric stability, and appearance.
Underlay, direction, and pull compensation
Underlay provides a foundation beneath visible stitches. On terry cloth, a suitable foundation can help stabilize the design and give top stitches a more consistent surface. The best underlay depends on the design, size, and material; there is no single setting that suits every towel.
Stitch direction also affects how a design sits on the fabric. Direction can influence coverage, texture, and the way adjoining sections meet. A digitizer considers how stitch angles relate to the shapes in the artwork, the sequence of design elements, and the risk of gaps or uneven transitions.
Fabric can shift or pull as stitches form, changing the proportions of the finished design. Pull compensation is one tool used to account for that movement. It needs to be applied thoughtfully: too little may leave edges short or gaps between sections, while too much can distort the shape. The correct approach depends on the design and the towel’s behavior during sewing.
What to check in a sew-out
A sew-out reveals issues that a digital preview cannot. Whenever possible, review the design on the actual towel or a comparable fabric. Look at the lettering, outlines, fill coverage, and overall balance—not just whether the machine completed the design.
- Are small letters legible at the finished size?
- Do the fill areas cover the pile without feeling unnecessarily dense?
- Are edges and adjoining sections aligned as intended?
- Does the design remain stable, with no obvious gaps or distortion?
- Does the finished result suit the towel’s texture and intended use?
Feedback from a sew-out can guide adjustments to density, underlay, compensation, or stitch sequence. If the result looks uneven, adding more stitches is not automatically the answer. The cause may be the design’s scale, the interaction between the pile and the stitches, or a mismatch between the file and the production setup.
Backing and production preparation
Stabilization is another part of the production picture. The appropriate backing depends on the towel, design, and embroidery process. A stable setup helps support the material while it is being stitched, but the backing should be selected for the job rather than treated as a substitute for sound digitizing. For a general overview of this production consideration, see towel embroidery backing.
Before production, confirm the design size and placement, the fabric type, and the file format required by the embroidery machine. DST is a common production format, but the correct deliverable depends on the machine and workflow. A production-ready file should carry the intended stitch sequence and settings—not just the visual outline of the artwork.
When discussing a towel design with a digitizing provider, share clear artwork and practical production details. Specify the finished dimensions, where the design will be placed, and whether there are small text or fine-detail requirements. If you have a sample sew-out or notes about a previous production issue, that information can also help focus the digitizing decisions.
When professional digitizing is especially useful
Some towel designs are straightforward, while others benefit from careful planning before they go to the machine. Professional support is especially valuable when a logo includes small lettering, multiple overlapping elements, narrow borders, or large fill areas. It is also useful when a design needs to be adapted from another garment type or when earlier sew-outs have produced soft details, gaps, or uneven coverage.
Eagle Digitizing provides embroidery digitizing services for customers who need artwork prepared for embroidery production. For towel work, clear communication about the material, dimensions, placement, and intended result helps guide decisions around underlay, density, stitch direction, and compensation. These details connect the visual artwork to the real fabric and production requirements.
If a previous file was made for a different fabric, it may not be ready for terry cloth without review. The design’s stitch plan should suit the towel rather than assume that the same settings will perform identically across materials. To ask about a design or production concern, contact Eagle Digitizing with the artwork and relevant project details.
Bring the artwork and the fabric together
A clean towel sew-out depends on more than a recognizable logo. Design scale, stitch coverage, underlay, fabric stability, and machine production all influence the result. Treating terry as a distinct embroidery surface allows the digitizing to address its pile and helps avoid relying on last-minute machine adjustments to solve design problems.
For clearer towel embroidery digitizing, share the actual design size and towel requirements before production. Eagle Digitizing can help prepare terry cloth embroidery files with the fabric and intended result in mind. Reach out with your artwork to discuss the digitizing needs for your next towel project.