
How to Fix foam collapse in medical uniform embroidery
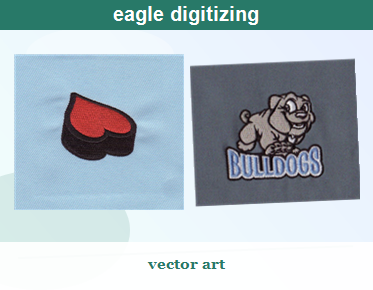
To fix foam collapse in medical uniform embroidery, reduce stitch density, match the design to the garment fabric, strengthen underlay, and test the file before production. On medical wear, a stable result usually comes from cleaner digitizing, not heavier stitching. If you need a production-ready file, left chest logo digitizing support can help you quote the job and Upload Your Design with confidence.
Why Foam Collapse Happens on Medical Garments
Foam collapse usually starts when the embroidery pushes too hard into a soft or flexible garment. Scrubs, lab coats, and other uniform embroidery pieces can shift under the needle, so the foam loses shape, sinks, or looks crushed after stitching.
Choose Fabric and Placement That Can Hold the Design
Medical uniforms often use smooth knits, moisture-wicking blends, or stretch fabrics that need careful setup. digitizing for performance fabric matters because the same foam height that looks crisp on a jacket may fail on a soft scrub top. Place the design where the fabric is most stable.
Lower Stitch Density Before the Foam Starts to Break Down
High stitch density is one of the fastest ways to crush foam. A dense fill locks the stitches too tightly, presses the foam flat, and creates a stiff, lumpy finish. Keep coverage clean, but allow enough spacing for the foam to stay lifted and readable.
Build Better Underlay and Pull Compensation
Foam needs a firm base. Proper underlay supports the surface stitches, while pull compensation keeps edges from tightening inward. Without both, the embroidered shape can shrink, flatten, or distort, especially around letters, corners, and narrow medical logos.
Clean the Artwork Before You Digitize
Bad source art makes foam problems worse. Before stitching, remove jagged edges, stray points, and extra details that force unnecessary needle movement. A good embroidery file conversion service should simplify the art so the stitch path follows the design, not the artwork noise.
Use the Right Stitch Type for the Logo Detail
Foam collapse often appears when the design uses the wrong stitch for the job. Large areas may need cleaner fills, while thin text may need controlled satin columns or a lighter approach. The goal is to preserve logo detail without overloading the foam.
Keep Thread Direction and Stitch Path Consistent
Thread direction affects how the embroidery sits on the foam and how the eye reads the shape. If the stitch path changes too often, the design can look uneven or flattened. Clean routing helps the foam stay balanced and gives the logo a sharper finish.
Match the Design to the Garment Location
A left chest logo on a medical polo is not the same as a back yoke mark or sleeve emblem. embroidered logo setup service is valuable here because the size, angle, and fabric behavior all change by placement. A good setup reduces collapse before production starts.
Do a Sew-Out on the Actual Uniform
Never judge foam results from a screen alone. Sew-outs reveal how the foam reacts to real tension, needle penetration, and garment movement. If the sample starts collapsing, adjust density, underlay, or pathing before the full order runs. Contact Us for a production review before you commit to a large batch.
Watch for Common Production Mistakes
Collapsed foam is often caused by the wrong needle, too much top tension, poor hooping, or a design that was not built for the fabric. Even good artwork can fail if the machine settings fight the garment. Medical uniforms need a balanced setup that keeps the surface smooth and stable.
How Eagle Digitizing Supports Better Results
Eagle Digitizing focuses on file preparation that is ready for production, not just visually clean. That means checking stitch flow, simplifying problem areas, and preparing the design so the embroidery machine can handle the fabric with less risk of collapse, distortion, or rework.
When to Avoid Heavy Foam Altogether
Some medical garments are simply not ideal for raised foam. Lightweight scrubs, stretch panels, and areas that get frequent laundering often look better with flat embroidery. In those cases, a cleaner low-profile file may deliver a more professional and durable finish than forcing a 3D effect.
FAQ
Why does foam collapse during medical uniform embroidery?
Foam collapse usually happens because the stitch density is too high, the fabric is too soft, or the design lacks enough underlay and pull compensation.
Can foam embroidery work on scrubs and lab coats?
Yes, but only if the placement, fabric, and digitizing are controlled carefully. Many medical uniforms look better with a lower-profile design.
What file prep helps prevent foam collapse?
Clean vector art, simplified detail, proper stitch paths, and a sew-out test on the actual garment are the best ways to prevent collapse.
Stable Results Start Before the First Stitch
The best way to prevent foam collapse in medical uniform embroidery is to treat digitizing as part of production, not an afterthought. When the artwork, fabric, and stitch plan work together, the logo stays crisp through wear and washing. If you are planning a new run, Eagle Digitizing can help you prepare the file the right way, so you can Get a Free Estimate and Start Your Embroidery Project with less guesswork.