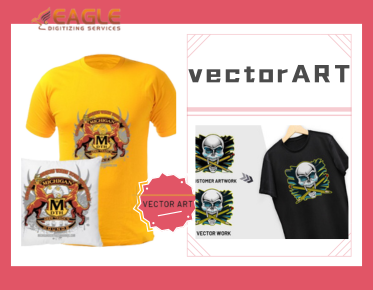
How do I convert an image to Vector Illustrator?
Converting an image to a vector format using Adobe Illustrator can seem daunting at first, but with the right steps, the process is straightforward and efficient. A vector image is resolution-independent and allows you to resize your images without losing quality, making it ideal for logos, icons, and other designs. Let's dive into the nuts and bolts of converting images into vector illustrations.
Understanding the Basics of Vectorization
Before we begin, it’s important to understand what vectorization means. A vector image is made up of paths defined by a start and end point, along with other points, curves, and angles along the way. This differs from raster images that are composed of pixels. The process of converting a raster image into a vector format is called vectorization or image tracing, and Adobe Illustrator offers robust tools to accomplish this.
Steps to Convert an Image to Vector in Illustrator
Step 1: Open Your Image in Illustrator
Start by launching Adobe Illustrator and opening the image you wish to convert. You can do this by navigating to 'File' > 'Open' and selecting your image file. Once open, it will appear as a new document.
Step 2: Use the Image Trace Tool
In the top menu, click 'Window' > 'Image Trace' to open the Image Trace panel. Here, you'll see several preset options that will adjust to different types of images and desired outcomes. For photos with a lot of detail, such as photographs or complex designs, choose the 'High Fidelity Photo' option. For simpler images, like logos or simple drawings, 'Black and White Logo' is usually sufficient.
Tweak the Image Trace settings until you’re satisfied with the vector art. The adjustments you might make include increasing the 'Threshold' to capture more of the image details or choosing different color options for more simplicity or detail.
Step 3: Adjust the Image Trace Settings
Experiment with the sliders in the Image Trace panel to fine-tune the look of your vector image. You can adjust the number of colors, paths, corners, and noise, giving you significant control over the final appearance.
Step 4: Expand the Appearance
Once you are satisfied with the tracing results, click the 'Expand' button in the Control panel to convert the trace into editable vector paths. This step is crucial because it separates the image into its vector components, allowing you further editing in Illustrator.
Step 5: Save the File in Vector Format
To complete the process, save your newly created vector file. Go to 'File' > 'Save As' and choose a vector format like AI, PDF, SVG, or EPS. Each format has its own advantages. For instance, SVG is excellent for web use, while AI is the native format for Illustrator and best for printing.
Professional Vector Conversion Services
If manual conversion seems overwhelming, professional services, such as those offered by Eagle Digitizing, can help. With services ranging from raster to vector conversion, vector tracing, and logo design, they cater to clients needing high-quality, scalable vector images for a range of applications. Eagle Digitizing is renowned for its vector art services online that provide quick turnaround times and precision tracing, ensuring that the essence and clarity of the original artwork are maintained.
Future of Vector Graphics
As the demand for digital media continues to rise, so too will the importance of having vector graphics that can scale across different platforms and uses. With advancements in vectorization technologies, the future promises easier and more intuitive tools that will allow even beginners to produce high-quality vector graphics effortlessly. For businesses and artists looking for high-resolution, detailed graphics, vector conversion is an indispensable skill set or service. Is your business ready to harness the power of vector graphics?


.png)