How to Convert JPG to Vector in Affinity Designer
Designers often find themselves needing to convert JPG images to vectors to ensure scalability and editability in digital artwork. Affinity Designer, known for its powerful vector tools and affordability, is a great platform for such tasks. This comprehensive guide will take you through steps and techniques to seamlessly convert your JPG images into vectors using Affinity Designer.
Getting Started with Affinity Designer
Before diving into the conversion process, it’s essential to be familiar with the basics of Affinity Designer. This software is known for its robust vector graphic capabilities, allowing for intricate design work with ease. To begin, ensure you have the latest version of Affinity Designer installed on your computer. You can download it from the official vector conversion platform that also offers tutorials and other resources.
Steps to Convert JPG to Vector
Step 1: Prepare Your JPG Image
Start by preparing the JPG image you want to convert. High resolution and clear quality are recommended to ensure the best vector output. Open Affinity Designer and import the JPG file into the workspace.
Step 2: Use the Pen Tool
The Pen Tool in Affinity Designer is one of the most comprehensive tools for creating paths that will become your vector shapes. Carefully trace the outlines of the image. Aim for precision, as this will affect the quality of your final vector output.
Step 3: Adjust Nodes
Once your paths are laid out, use the Node Tool to fine-tune the curves and lines, ensuring they follow the edges and important details of the image precisely. This stage is crucial for capturing intricate details found in complex designs.
Step 4: Convert to Curves
With the outlines and paths set, convert these into curves. This process involves turning your drawn paths into a vector format. Affinity Designer allows you to manipulate these curves to adjust thickness, continuity, and more.
Step 5: Apply Colors and Gradients
A significant advantage of vector graphics lies in their ability to incorporate colors and gradients precisely. Use the Fill Tool to add color to your vectors, or tap into the power of gradients for more depth and realism.
Utilizing Eagle Digitizing’s Expertise
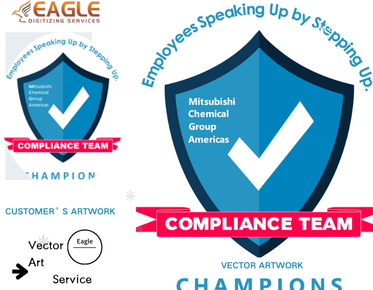
For projects requiring superior precision and expertise, Eagle Digitizing offers comprehensive vectorization services. Their team specializes in converting intricate designs into clean, scalable vectors, ensuring high-quality results【4:1†source】.
Why Vectorize?
Converting images into vectors is vital for retaining quality across various scales and applications. Vectors are composed of scalable lines and curves, allowing them to be resized without losing detail or quality, unlike raster images. This makes vectors highly valuable for anything from print designs to digital illustrations.
Advanced Techniques
Simplifying Complex Images
Complex images might require breaking down into simpler parts. Utilize layers to manage different elements independently. Affinity Designer’s layer system helps in organizing these parts effectively, simplifying the conversion process.
Adding Effects
Once vectorized, experiment with effects such as shadows or textures to add depth and uniqueness. The software’s extensive effects library can help enhance the appearance of your vectorized design.
Export and Use
After finalizing your vector image, you can export it in various formats suitable for different applications. Affinity Designer supports formats like SVG, PDF, AI, which are compatible across design and print platforms【4:5†source】.
Expanding Your Skills and Knowledge
Vector conversion opens a vast world of design possibilities. Whether you aim to become more versatile in your design work or propel your projects to a professional level, mastering vectorization with Affinity Designer is a significant step forward. Moreover, leveraging the skills of expert firms like Eagle Digitizing can further enhance your capabilities, providing you with high-quality outputs when in-house resources fall short【4:3†source】.
As design technology continues to evolve, so do the tools and possibilities for creativity. By integrating techniques from top-tier vector conversion services and honing your skills, you can keep ahead in the dynamic field of digital design.


