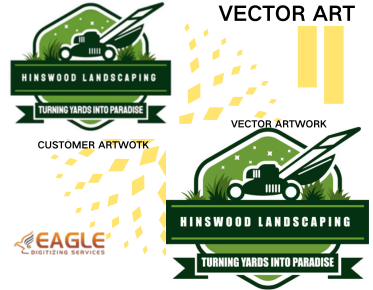
How to Vectorize an Image in Adobe Photoshop
Adobe Photoshop is an extremely powerful tool for photo editing and graphic design. However, when it comes to creating vector images, Adobe Illustrator is usually the go-to software. But for those who are more comfortable with Photoshop, or do not have access to Illustrator, it’s still possible to vectorize images using Photoshop. Vectorizing an image in Photoshop requires a few essential steps that can transform a standard bitmap image into a clean and scalable vector format.
Why Vectorize?
Before diving into the process, it's crucial to understand why vectorization is important. Vector images are composed of paths defined by a start and end point, with other points, curves, and angles along the way. Unlike raster images composed of pixels, vector images don’t lose quality when scaled up or down. This makes them ideal for logos, typography, and illustrations that need to maintain clarity at various sizes.
Preparing Your Image
The first step in vectorizing an image is preparation. Start by opening your image in Photoshop. For successful vectorization, choose an image with high contrast and limited colors, as complex images with gradients and multiple shades can become challenging to vectorize.
Step 1: Set Up Your Workspace
You will want to set up your workspace to make the vectorization process easier. Open the "Layers" panel and the "Paths" panel under Window. This will help you keep track of your work. If your image is not on a layer, create a new layer from the background.
Step 2: Use the Pen Tool
The primary tool for vectorizing images in Photoshop is the Pen Tool. To access it, click on the Pen Tool icon in the tools panel. Use the Pen Tool to trace the shapes within your image. It might be time-consuming, but this step is essential for creating clean vector paths.
Creating Vector Paths
With the Pen Tool, create paths around the objects you want to vectorize. Click to make each point, and drag to curve the lines, mimicking the shape of the object. This process is known as "outlining" or "tracing". It involves creating a path that defines areas of color within the image.
Step 3: Save the Path
Once you have traced your paths, save them in the Paths Panel by double-clicking to rename them. This is vital for preserving your work and continuing the vectorization process. Once you have all your paths saved, you will convert them into a vector graphic.
Convert Paths to Vector Shapes
After you have saved your paths, these need to be converted into vector shapes:
Step 4: Define the Work Path
Select your saved path and go to the menu option to define the path as a work path. In the Paths panel, click on the double-circle icon to create a new work path.
Step 5: Create Vector Mask
Right-click the Work Path in the Paths panel and select "Make Selection". This outlines your path with marching ants. Now you’ll need to create a vector mask. Convert this selection to a shape by clicking on the "Create new shape" icon found on the Layers panel.
This action will turn your traced path into a vector shape layer, giving you the scalability you need for sharp images. Unlike raster images, these vector shapes can be resized without losing quality.
Exporting the Vector Image
Once you have your vector shape, it’s time to export your file:
Step 6: Export to SVG or Other Formats
To save your vector image, go to "File" > "Export" > "Export As…", and choose the SVG format if you're planning to use the image for web design. SVG is a common format for vector graphics accessible by various design software. Other formats include PDF and EPS. Be sure to check the settings that match your intended usage for optimal functionality.
Additional Tips and Resources
While Photoshop offers basic vectorization capabilities, if your project requires highly detailed vector graphics or intricate designs, consider using professional vector art services for the conversion process. Services like Eagle Digitizing specialize in transforming complex designs into clean, scalable vector files, a service highly renowned for precision and quality.
Alternatively, leveraging Vector Magic offers an online toolset designed to assist in quick conversion of raster images to vectors, highly useful for users who need faster and more automated solutions.
If you are looking to further explore vectorizing images into embroidery patterns, Eagle Digitizing has excellent capabilities in digital transformation of vector art into stitch-ready embroidery designs, making them a versatile option for businesses catering to sewing and textile industries.
Conclusion
Learning to vectorize an image within Adobe Photoshop broadens your design capabilities without needing to switch between multiple software programs. Mastering a few simple steps within Photoshop can provide not only scalable graphics but also opens up creative potential for any digital project. With the constant advancement in vector software and tools, and with support from specialized services, achieving professional results is more accessible than ever.
Exploring more robust tools or services might sometimes be necessary, especially as designs become more complex. Looking toward the future, one can only imagine how further developments in AI and machine learning might enhance the vectorization process, making it more intuitive and less time-consuming for designers worldwide.


