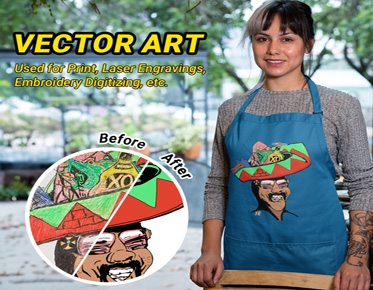
The Art of Vectorizing: Techniques for Converting Raster Images to Vectors
In today's digital age, the ability to convert raster images to vectors is a valuable skill that opens up endless creative possibilities. Whether you're a graphic designer, illustrator, or digital artist, mastering the art of vectorization allows you to create scalable, high-quality graphics that can be used for a variety of purposes, from print and web design to branding and marketing. In this blog post, we'll explore the art of vectorizing and share techniques for converting raster images to vectors like a pro.
Understanding Vectorization
Vectorization is the process of converting raster images, which are composed of pixels, into vector graphics, which are made up of mathematical paths and curves. Unlike raster images, which have a fixed resolution and can become pixelated when scaled up, vector graphics can be resized indefinitely without losing quality, making them ideal for use in various design projects. Here are some key techniquesfor vectorizing raster images:
1. Manual Tracing
Manual tracing, also known as hand tracing or pen tool tracing, involves using vector drawing tools to trace over the outlines and details of a raster image manually. This technique requires precision and attention to detail but allows for complete control over the vectorization process. Use the pen tool, bezier curves, and anchor points to create smooth, accurate paths that replicate the original artwork.
2. Automatic Tracing
Automatic tracing, also known as image tracing or auto-trace, uses specialized software algorithms to analyze the colors and shapes in a raster image and convert them into vector paths automatically. This technique is faster than manual tracing but may produce less accurate results, especially for complex or detailed images. Experiment with different tracing presets and settings to achieve the desired level of detail and accuracy.
3. Simplification and Cleanup
After vectorizing araster image, it's essential to simplify and clean up the resulting vector paths to ensure optimal quality and efficiency. Remove unnecessary anchor points, smooth out curves, and adjust path segments to eliminate jagged edges and irregularities. Use tools like the pathfinder panel, simplify command, and direct selection tool to refine the vector artwork and achieve a polished finish.
4. Color Separation
When vectorizing a colored raster image, consider separating the colors into individual vector layers or objects for greater flexibility and control. Use the eyedropper tool to sample colors from the original image and apply them to the corresponding vector elements. Organize the layers and objects logically to streamline the editing process and facilitate future modifications.
5. Fine-Tuning and Optimization
Once the vectorization process is complete, fine-tune the vector artwork to ensure consistency, balance, and visual appeal. Adjust stroke weights, fill colors, and transparency settings to achieve the desired aesthetic. Optimize the vector file size by removing redundant elements, merging overlapping paths, and simplifying complex shapes. Preview the vector artwork at different sizes to ensure scalability and readability across various platforms and devices.
Best Practices for Vectorizing
Raster Images
To achieve the best results when vectorizing raster images, follow these best practices:
1. Start with High-Quality Source Images
Begin with high-resolution raster images that are clear, well-defined, and free of artifacts or distortion. The quality of the source image directly impacts the quality of the vectorized artwork, so choose images with sufficient detail and clarity.
2. Understand the Purpose and Requirements
Consider the intended use of the vectorized artwork and any specific requirements or constraints, such as color accuracy, file format, or scalability. Tailor the vectorization process to meet these needs and ensure compatibility with the final application.
3. Maintain Originality and Creativity
While vectorization aims to replicate the original raster image in vector form, don't be afraid to inject your creativity and artistic flair into the process. Experiment with different styles, techniques, and effects to enhance the visual impact of the vector artwork and make it truly unique.
4. Practice and Experiment
Vectorization is a skill that improves with practice and experimentation. Take the time to explore different tools, techniques, and workflows to find what works best for you. Don't be afraid to make mistakes or try new approaches – it's all part of the learning process.
Conclusion
Mastering the art of vectorizing raster images is a valuable skill that empowers designers and artists to create scalable, high-quality graphics with ease. By understanding the techniques and best practices outlined in this guide, you can confidently convert raster images to vectors like a pro and unlock new possibilities for your creative projects. So embrace the power of vectorization, unleash your creativity, and elevate your design work to new heights of excellence and innovation.
Eagle Digitizing offers professional vector art services, helping you transform your raster images into high-quality vectors with precision
and efficiency.


.png)
